What Are They and How Can I Get Some?
OR: All my backgrounds go to the edge; isn’t that good enough?
It seems like it should be just fine. You’re designing a magazine and you’ve got some cool backgrounds you want to use and you’d like them to bleed. So in your page layout document, which you set up at 8.375 x 10.875 (a standard web size), you drop in a Photoshop background file that’s 8.375 x 10.875. It exactly fills the page in your document. Perfect, right? Well, not exactly.
Read on for the mystery of bleeds revealed!
Whether your job is printed on a sheetfed press or a web press, the signatures are printed on paper that’s actually larger than the finished size of your book. Then these large signatures are folded down so the pages end up in the correct order. After that, they’re assembled and made into your finished piece, for example, a saddle stitched book. Finally, the books are trimmed so that all the pages have a nice, clean, finished look.
All of the processes mentioned have the potential for variations. So what does that mean in relation to how you build your bleeds? In web printing, large rolls of paper feed through a press at hundreds of feet a minute. At these speeds, the paper can move slightly, which means that the content of some of the pages may be a bit closer or further away from the edge than in your original file.
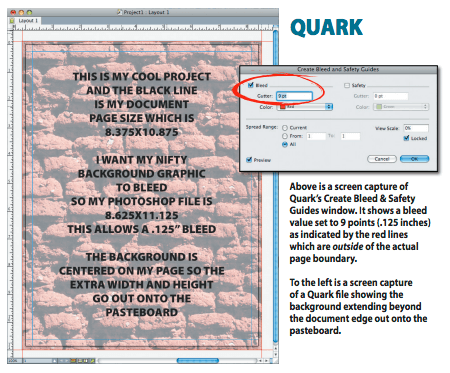
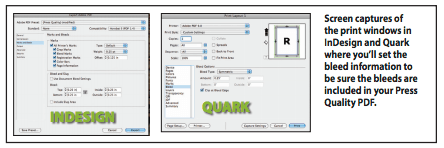
At the trimming stage, if your original layout doesn’t bleed properly and the trim is slightly less than expected, it’s possible that your background graphic will not reach the trim edge, leaving your page with an unintentional white margin. To ensure that this doesn’t happen, anything that’s supposed to bleed has to actually extend beyond the trim edge of the document page, out onto the pasteboard. Our minimum bleed is .125 inches and we prefer .25 inches. Below are screen captures for both InDesign and Quark, showing the windows where you can set bleed marks. You’ll be able to see at a glance on each page of your layout whether your bleeds have been extended far enough.


So back to your cool background graphic. If you want it to bleed and you’re planning to do our minimum .125 inch bleed, your Photoshop file needs to be 8.625 x 11.125. Now when you drop it into your document and center it, the image will completely fill the page and the extra .125 inches on each side will correctly bleed out onto the pasteboard, all the way out to the red bleed lines. With this little bit of insurance, even the minor variations associated with printing won’t create a situation where your graphic stops short of the edge of the page.
